
And a lot can stay the same.
A little over five years have come and gone since I wrote Questions About Tooling, and as I was paging through my site — handling my quarterly SSL certificate reissuance, because it’s easier spending five minutes re-running the same certbot command every three months than 20 minutes figuring out how to automate it — I found this post pretty interesting to look back on.
I completely switched to Yarn shortly after writing the post, and I loved the experience. But I’ve recently come back to npm after the yarn 2.0 release and the sheer number of steps required to migrate legacy codebases — of which I maintain many — to their PnP architecture. I keep forgetting to add run to my commands, but other than that npm is just fine.
Well, webpack definitely won this one. I still maintain a few repos with browserify-based scripting, but any new project will have webpack enabled from the start. The experience with webpack is a lot better now too, as this will typically be abstracted away from you via create-react-app, create-next-app, create-remix, or whatever scripts you’re using to bootstrap your platform of choice. All of the advantages of webpack with none — well, less — of the googling to figure out what packages you need to install for your code to compile.
I’m still very happy with VS Code — to the point that we’re now using it’s core architecture to power the SuperHi Editor — though I no longer put as much effort into theming as I once did. I’ll set the typeface to 16px IBMPlexMono-Regular, choose a nice theme with light and dark modes and leave everything else. Once I’ve added Prettier, GitLens and ESLint of course.
Another resounding win in the column, this time for Typescript. The tooling’s gotten even better and the team are constantly adding new features and various improvements to the way that it works. At this point I’m uncomfortable whenever I have to write vanilla JavaScript, as I need all of the various safeties and niceties of Typescript to protect me from myself.
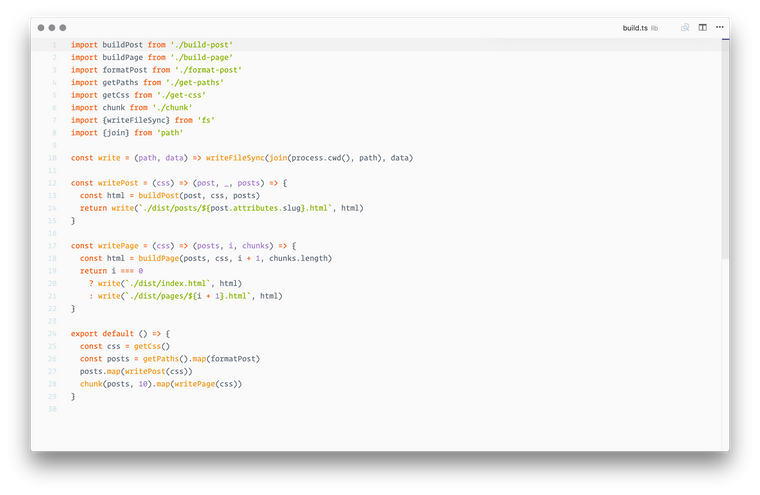
Personally, I’m still here at SuperHi, though in a slightly different role from five years ago. Most of my days are now spent in research, support, management and meetings, though I still have the opportunity to write code here and there. Over the past few weeks I’ve been reviewing our tech stack as we start to ramp up hiring for a load of new projects that’re close to kicking off.
The first thing you’ll need to do is check out the instructions on using TypeScript in the Redux docs, they’re extremely well written and are our saving grace here, allowing us to get up-and-running quickly with a slightly verbose — but clean and type-safe — initial set-up.
We’ll only be writing a small application that toggles a single property in the store, but everything here gives you the toolset you need to expand upon and build a real-world application with. In fact, most of the code is taken directly from the new SuperHi Editor that I’ve been working on.
We’ll dive in:
import { Record } from 'immutable'

export type AuthStatus = 'LOGGED_IN' | 'LOGGED_OUT'

export interface AuthStateProps {
  status: AuthStatus
}

const initialAuthState = Record<AuthStateProps>({
  status: 'LOGGED_OUT'
})

export class AuthState extends initialAuthState implements AuthStateProps {}

export const LOGGED_IN = 'LOGGED_IN'
export const LOGGED_OUT = 'LOGGED_OUT'

interface LoggedInAction {
  type: typeof LOGGED_IN
}

interface LoggedOutAction {
  type: typeof LOGGED_OUT
}

export type AuthActionTypes = LoggedInAction | LoggedOutAction
The first file is auth/types.ts, it’s very similar to the Redux docs on Type Checking Actions & Action Creators but deviates with the use of immutable.js, we’re using Immutable in the SuperHi Editor because it’s noticeably faster than working with large JavaScript objects. The Redux docs on Using Immutable.JS with Redux are again a good starting point but we’re ignoring their best practices — such as using a Higher order Component to convert Immutable objects to JS objects — in the name of speed, everything is an Immutable object — typically Records — and we’ll work with them directly.
Why Immutable Records? Because they’re much “safer” than Immutable Maps. Basically, a record allows us to guarantee the keys, so when we type record.get('filenamr') instead of record.get('filename') TypeScript will tell us we’ve done something wrong.
First we set up the plain object — or “props” — for the state:
export interface AuthStateProps {
  status: AuthStatus
}
Then we create the initial state given the default props:
const initialAuthState = Record<AuthStateProps>({
  status: 'LOGGED_OUT'
})
And then we build a class that extends this Record, allowing us to build records with new AuthState(props):
export class AuthState extends initialAuthState implements AuthStateProps {}
Typically in this class we’d also want to add the props — in this case there’s just one: public readonly status!: AuthStatus — but if you’re using create-react-app — as we do in the SuperHi Editor — then you’re compiling your TypeScript with Babel, not with TypeScript itself and this will lead to a runtime error of Cannot set on an immutable record.
Now for auth/actions.ts
import { LOGGED_IN, LOGGED_OUT, AuthActionTypes } from './types'

export const loggedIn = (): AuthActionTypes => ({
  type: LOGGED_IN
})

export const loggedOut = (): AuthActionTypes => ({
  type: LOGGED_OUT
})
This is really simple and — for now! — exactly the same as the Redux docs. We’ll come back to actions when we implement thunk actions later.
For auth/reducers.ts
import { AuthState, AuthActionTypes, LOGGED_IN, LOGGED_OUT } from './types'

export const initialState = new AuthState()

export default (state = initialState, action: AuthActionTypes) => {
  switch (action.type) {
    case LOGGED_IN:
      return state.set('status', 'LOGGED_IN')
    case LOGGED_OUT:
      return state.set('status', 'LOGGED_OUT')
    default:
      return state
  }
}
Pretty similar here too, though we build an initialState with our AuthState Record and export it for later. Because we’re using AuthActionTypes here TypeScript will know
exactly what payload to expect with each case, although in our demo it’ll always be empty.
We’ll also add auth/selectors.ts so we can grab that status as needed:
import { createSelector } from 'reselect'
import { AuthStatus } from './types'
import { AppState } from '../reducers'

export const selectAuthStatus = createSelector(
  (state: AppState) => state.getIn(['auth', 'status']),
  (authStatus: AuthStatus) => authStatus
)
We can use createSelector here as authStatus is going to be a standard JS string but if we instead wanted to select the entire auth slice of the store we’d need to do:
import { createSelectorCreator, defaultMemoize } from 'reselect'
import { is } from 'immutable'
import { AuthState } from './types'
import { AppState } from '../reducers'

const createImmutableSelector = createSelectorCreator(defaultMemoize, is)

export const selectAuth = createImmutableSelector(
  (state: AppState) => state.get('auth'),
  (auth: AuthState) => auth
)
This allows us to use Immutable’s is function to compare two immutable objects — in this case the previous auth state and the new auth state — guaranteeing whether or not they’re the same and making sure we don’t re-render the React app accidentally.
Our root reducers.ts file is where things get a little messy:
import { Record } from 'immutable'
import { Reducer } from 'redux'
import { ThunkDispatch as TDispatch, ThunkAction as TAction } from 'redux-thunk'
import { combineReducers } from 'redux-immutable'
import { BatchAction } from 'redux-batched-actions'
import authReducer, { initialState as initialAuthState } from './auth/reducers'
import { AuthState, AuthActionTypes } from './auth/types'

interface AppStateProps {
  auth: AuthState
}

const initialAppState = Record<AppStateProps>({
  auth: initialAuthState
})

export class AppState extends initialAppState implements AppStateProps {}

export type AllActionTypes = AuthActionTypes | BatchAction

export type ThunkDispatch = TDispatch<AppState, null, AllActionTypes>

export type ThunkAction = TAction<void, AppState, null, AllActionTypes>

const rootReducer = combineReducers({ auth: authReducer })

export default (rootReducer as unknown) as Reducer<AppState, AllActionTypes>
The first thing we do is set up AppState just as we did with AuthState, using the initialAuthState we defined in auth/reducers.ts
We export a union of all action types, this includes the AuthActionTypes — and as any other action types you might’ve used — as well as the special BatchAction type, allowing us to safely dispatch batchActions too. We also export a ThunkDispatch built up of the AppState, void — because we’re not using any extra arguments with redux-thunk — and AllActionTypes as well as ThunkAction built the same way, with void as the first type argument as we won’t be returning anything from our thunk actions.
Finally we build the rootReducer and then, because redux-immutable only allows us to use a Map here, we lie to TypeScript — and ourselves — and say this is actually a Reducer of AppState and AllActionTypes. This will give us type-checking for keys in the store even though in practice we don’t have these guarantees, the API for Immutable Maps and Records are very similar so we can get away with it here.
And then in store.ts:
import { createStore, applyMiddleware } from 'redux'
import { enableBatching } from 'redux-batched-actions'
import thunk from 'redux-thunk'
import reducers from './reducers'
import middlewareReducer from './middleware/reducers'

const middleware = applyMiddleware(thunk, middlewareReducer)

const store = createStore(enableBatching(reducers), middleware)

export default store
This looks pretty much as you’d expect, but wait, where did that middleware come from? We’ll have a look at how to use middleware with all of this:
import { MiddlewareAPI } from 'redux'
import { AllActionTypes, ThunkDispatch } from '../reducers'

export default ({ dispatch }: MiddlewareAPI<ThunkDispatch>) => (next: ThunkDispatch) => async (
  action: AllActionTypes
) => {
  next(action)
}
It’s actually not too bad! We’re using our previously declared ThunkDispatch here to make sure we can dispatch on both normal actions and thunk actions. We could even set up a switch statement here and get the same level of safety we did in auth/reducers.ts. Note if you add your own special middleware-only actions you’re also going to want to set up middleware/types.ts and middleware/actions.ts files for these and add the actions to AllActionTypes in reducers.ts.
Speaking of auth, we’ll add a thunk action to auth/actions.ts:
export const handleLogIn = (payload: {
  username: string
  password: string
}): ThunkAction => dispatch => {
  // do stuff with the username and password, typically done in middleware for
  // side-effecting stuff like this.
  dispatch(loggedIn())
}
We’ll use our ThunkAction here from reducers.ts to keep TypeScript happy, and if we use this in a component:
import React from 'react'
import { bindActionCreators } from 'redux'
import { connect } from 'react-redux'
import { AppState, ThunkDispatch } from '../store/reducers'
import { selectAuthStatus } from '../store/auth/selectors'
import { handleLogIn } from '../store/auth/actions'

const mapStateToProps = (state: AppState) => ({
  authStatus: selectAuthStatus(state)
})

const mapDispatchToProps = (dispatch: ThunkDispatch) =>
  bindActionCreators({ handleLogIn }, dispatch)

type Props = ReturnType<typeof mapStateToProps> & ReturnType<typeof mapDispatchToProps>

const Index = ({ authStatus, handleLogIn }: Props) => {
  return authStatus === 'LOGGED_IN' ? (
    <div>Logged In</div>
  ) : (
    <div
      onClick={() =>
        handleLogIn({
          username: 'artcommacode',
          password: 'this-is-not-my-password'
        })
      }
    >
      Log In
    </div>
  )
}

export default connect(mapStateToProps, mapDispatchToProps)(Index)
Here it’s again mostly the same as you’ll see in docs, the trick is using AppState and ThunkDispatch from our root reducer file in mapStateToProps and mapDispatchToProps, and ReturnType<typeof mapStateToProps> & ReturnType<typeof mapDispatchToProps> to get the actual shape of our props for the component. You can also extend Props if there’s any props being passed in from above. We’re also using our selector from auth/selectors.ts to make sure our data is memoised.
One final gotcha is if you’re importing your store in a file and using that directly — say you’re trying to do something right up top before you add your <Provider> wrapper — and dispatching a thunk action. Instead of store.dispatch(action()) you’ll want to do (store.dispatch as ThunkDispatch)(action()) so TypeScript knows what you’re trying to achieve here.
We’re also using Apollo in the SuperHi Editor and I considered adding detailed instructions on getting that set up as well, but in practice it depends on what you need. The easiest method is to throw out Redux and just use Apollo, but although Apollo gives you an internal cache it doesn’t have the tools — see above for the sheer number of them we’re using here! — for working on state like you would in Redux.
Instead, the solution we came up with was to implement Apollo as a Redux middleware which allows us to use Apollo’s client.watchQuery, client.mutate and client.queryManager.startGraphQLSubscription methods directly to talk to our API. It looks something like this:
switch (action.type) {
  case APOLLO_WATCH_QUERY: {
    const { name, query, variables, onResult, onError } = action.payload
    try {
      const observable = client.watchQuery({ query, variables })
      const { data } = await observable.result()
      if (data && data[name]) {
        dispatch(onResult({ [name]: data[name] }))
      } else {
        throw new Error(`${name} wasn't found in the response`)
      }
    } catch (error) {
      dispatch(onError({ error: error.message }))
    }
    break
  }
}
And we’re done. If you’re interested in how this all comes together then sign up for a SuperHi course and use our Editor!
A few months ago I started putting some one-liners and mini libraries that I’ve found useful up on Github. First make sure you have Node.js installed (I recommend using NVM to do so) then clone the repo and run npm install within the directory and then npm test to see everything pass. Feel free to open an issue if it doesn’t.
Look at the test.js files within each section to get an idea of how to use the functions, or read on for more detail.
const zip = <A,B>(xs: A[], ys: B[]): [A, B][] => (
  xs.map((x, i) => [x, ys[i]])
)
zip takes two arrays and returns them zipped up as pairs. If the second array is longer than the first it’ll be truncated and if it’s shorter it’ll be extended with undefined values.
const pluck = (key: string, xs: Object[]): [] => (
  xs.map((x) => x[key])
)
pluck takes a key and an array of objects and returns an array of values plucked from the objects by their key.
const flatten = (xs: []): [] => (
  xs.reduce((flat, x) => (
    flat.concat(Array.isArray(x) ? flatten(x) : [x])
  ), [])
)
flatten is a recursive function that takes nested arrays of any depth and returns a flattened version.
const range = (length: number): number[] => [...Array(length).keys()]
range takes a length and returns an array of that size populated by values ranging from 0 to the given number (exclusive).
const partition = <T>(xs: T[], fn: (x: T) => boolean): [T[], T[]] => (
  xs.reduce((p, x) => (
    fn(x) ? [p[0].concat([x]), p[1]] : [p[0], p[1].concat([x])]
  ), [[], []])
)
partition takes an array and a function to partition it by. Each value is tested by the function and if true is placed into the first partition and if false into the second.
const partial = default (fn: Function, ...args: any[]): Function => (
  (...argsN: any[]) => (
    fn(...args, ...argsN)
  )
)
partial takes one function and any number of arguments and returns another function that takes any further arguments and returns the result of applying both sets of arguments to the original function. For more detail, see the Wikipedia page on partial application.
const getIn = (object: Object, path: string[], notFound: any = null) => (
  path.reduce((obj, seg) => (obj && obj[seg] || notFound), object)
)
getIn takes an object, a path (as an array of strings) to follow through the object and an optional value (defaulting to null) to be returned if the path doesn’t resolve. It borrows heavily from the Clojure function of the same name.
const assocIn = (object: Object, [key, ...keys]: string[], value: any): Object => (
  {...object, [key]: keys.length ? assocIn(object[key], keys, value) : value}
)
assocIn takes an object, a path (as above) and a value and recursively builds up a new object that’s merged with the original. It’s for updating (or creating) nested values in objects and is again borrowed from a Clojure core function of the same name.
const mapcat = <T, U>(fn: (x: T) => U[], xs: T[]): U[] => (
  [].concat(...xs.map(fn))
)
mapcat takes an array and a function that returns an array and maps this function over the given array, concatenating the results into a single array. Similarities will be found in Clojure’s own mapcat.
const fnull = (fn: Function, ...args: any[]): Function => (
  (...argsN: any[]) => {
    const newArgs = args.reduce(([newArgs, [next, ...rest]], arg) => (
      [[...newArgs, arg === null ? next : arg], arg === null ? rest : [next, ...rest]]
    ), [[], argsN])[0]
    return fn(...newArgs)
  }
)
fnull takes a function and arguments to be passed to that function and returns a new function for any further arguments. If any of the first set of arguments is null they’ll be replaced in-order by arguments from the second set. The idea for this function is once again borrowed from Clojure’s core library, this time fnil.
Recently I’ve been asking myself some questions about the tools I use day-to-day and their possible alternatives. Please note all answers are purely personal and it’s likely your own experiences will differ, but if you feel you need to tell me I’m wrong — or right! — feel free to get in touch with me on Twitter.
Not just yet. Heroku — my deployment method of choice — say they support Yarn but my builds often fail. Added to this: Yarn can’t be installed the recommended way when using nvm, global installs (unfortunately sometimes necessary) don’t work as expected and the promised speed increases over npm aren’t noticeable when my 80KB/s internet connection is the bottleneck. As such I’m putting Yarn to the side for a little longer.
Probably not. From spending time in Slack and on Twitter you’d expect the gains to be massive but although my browserify scripts occasionally end up looking like the below there’s many methods to clean that up. Going back to hundreds of lines of JavaScript to control my builds feels too much like a return to gulp.
"NODE_ENV=production browserify ./src/App.js -t [ babelify --presets [ es2015 stage-2 react ] --plugins [ transform-flow-strip-types transform-class-properties ] ] | uglifyjs > ./public/js/bundle.js"
If you use browserify and feel like you’re missing out or if you use webpack and want to know how to do bundle splitting, loaders, source maps or more then I recommend checking out substack’s great post “browserify for webpack users”.
Absolutely! It’s less resource intensive, much faster and has a great set of defaults including: tooltips, css completion that actually works, debugging, great git integration and many neat tricks. Plus if you don’t mind hacking it up a little you can have a beautiful editor as well.
Maybe? Although TypeScript’s known to be unsound they make a good case for that and in my experience Flow has many issues with soundness too. VS Code’s TypeScript tooling makes it an obvious winner when using the editor but TypeScript also beats out Flow in the shear number of typings available for external libraries and hasn’t once yet told me that an EventEmitter isn’t an EventEmitter.
Either way they’re both a good midway point between untyped, vanilla JavaScript and something strongly typed like Purescript. I’m currently choosing between them on a project-by-project basis and usually use Flow for React and the frontend and TypeScript on the server.
Edit 03/2022: I have some more recent thoughts around JavaScript tooling here
Given an input of "a monad is just a monoid in the category of endofunctors" and an output of:
"a monad is just a monoid in the category of endofunctors"
"monad is just a monoid in the category of endofunctors"
"is just a monoid in the category of endofunctors"
"just a monoid in the category of endofunctors"
"a monoid in the category of endofunctors"
"monoid in the category of endofunctors"
"in the category of endofunctors"
"the category of endofunctors"
"category of endofunctors"
"of endofunctors"
"endofunctors"
How would you handle the transformation? My first idea was to use two folds (or reduce in JavaScript speak):
const permutations = (str) => {
  const words = str.split(' ')
  return words.reduce((p, _, i) => {
    return p.concat([words.reduce((s, word, j) => {
      return j >= i ? s + ` ${word}` : s
    }, '').trim()])
  }, [])
}
Here I’m splitting the string into an array of words and folding over it twice to build an array of strings of words. However the first fold is basically xs.reduce((ys, x) => ys.concat([fn(x)]), []) and is equivalent to xs.map(fn), meaning the above can be rewritten as:
const permutations = (str) => {
  const words = str.split(' ')
  return words.map((_, i) => (
    words.reduce((s, word, j) => (
      j >= i ? s + ` ${word}` : s
    ), '').trim()
  ))
}
Which is already a little easier to understand. But I don’t need that second fold at all, as instead of taking an array of words, finding all words past a certain index and concatenating them into a string it’s much neater to simply slice the array at that index and join it back into a string. If I re-rewrite the function I get:
const permutations = (str) => {
  const words = str.split(' ')
  return words.map((_, i) => words.slice(i).join(' '))
}
Much better! And seeing as JavaScript gives us the original array as the third argument to map I can take the whole thing down to a tweet-sized chunk:
const permutations = (str) => (
  str.split(' ').map((_, i, words) => words.slice(i).join(' '))
)
I have a habit of jumping straight to folds as the solution to list problems. Seeing as they’re the root of all iteration methods (it can be seen above how I accidentally implemented map and the same can be done for filter, some, find and all the others) the answer won’t be wrong, but it will be overly complicated. I’m quite happy with how easy it is to read the solution when compared to my initial attempt.
I put a lot of effort into avoiding mutation in my code and as such spend a heap of time typing const new = Object.assign({}, original, {changed}). In fact, in a recent project I wrote that 51 times.
However, it always felt like a bit of a hack having to supply the first argument as an empty object so it didn’t mutate the original. I mentioned this to a friend and they showed me a tiny, neat function that relies on ES6’s spread syntax:
const merge = (...xs) => Object.assign({}, ...xs)
This meant I could now write const new = merge(original, {changed}) instead, which seemed pretty neat until we thought about it a little and realised that all this time I could’ve just been writing const new = {...original, changed} instead…
Thanks for reading part two of my ongoing series on overthinking problems!

Recently I had the pleasure of working with Hassan Rahim on Geordie Wood’s new website.
It was fantastic. Working with Hassan’s clean, intelligent designs for a man who’s photographed the greats — from Obama to Gucci Mane — was an inspiration. Hassan’s attention to detail is immense and after his carefully labelled Dropbox folders and intensely annotated Invision boards I may never be happy to go back to the ubiquitous, industry standard PDF…
There were three main requirements for the project; a near instantaneous front end with the highest possible visual fidelity and an easy to use backend.
Now, these may seem fairly obvious requests for a photographer’s portfolio site but they’re not as common as you’d expect so here’s a little about how I went about it.
Starting with the frontend, working with large images meant I had to be sure I was sending correctly sized files to each and every client. Previously I’d resize the images on upload to the CMS, but this slows down the editing process and leaves me with just a few sizes to choose from.
So this time I turned to Imgix, and all I had to do was point it to an Amazon S3 bucket and make a request with the filename and dimensions of the image (calculated based on the size the image is to be shown at, the screen size and window.devicePixelRatio). I rounded all sizes to the nearest 50px to make sure I’d hit Imgix’s cache as often as possible, as a cache hit takes only a few milliseconds but with a miss it can be over a second as we wait for Imgix to resize the image before sending it back.

As an aside, I’m only using a few libraries on the frontend — React and React Router are the two big ones — and all my code’s written in what I’ve taken to calling ES6+ (ES6 with a few neat ES7 extras such as async and await) and compiled with Babel.
With the image sizes sorted I had to make sure they were loaded as quickly as possible. For the desktop I went with a very aggressive caching strategy that loads all of the slides in the background one-by-one. Though I made sure to take the first slide out of each project and loaded those in immediately so they were ready when the user interacted with the homepage.

For mobile it’s a little different as I couldn’t take the desktop strategy because at best it noticeably slowed things down and at worst it crashed the tab entirely (something that happened a lot on earlier iPads as low internal memory and large images aren’t a good mix). So instead the site waits until the user hits a slide and simply loads in that slide and the one immediately after it. It’s not a perfect solution but it still feels rapid and doesn’t cause any slow-downs.

The backend is very different, while the frontend is rendered almost entirely in the browser the backend is a more typical website. I use Express (I am a member of the organisation and an operator in the IRC channel #express after all), Postgres and a relative newcomer to the Node.js ORM scene: Objection.js. Prior to this I’d been using Bookshelf in all my projects but was increasingly dissatisfied with the way it forces a Backbone-like structure on you and felt that it made too many things (such as validation and nested relations) harder to implement than they should’ve been.
The Objection documentation is also a lot more thorough than Bookshelf’s and an example repo showing you how to write a basic site in ES5, ES6 and ES7 is an added bonus. Seeing as I was compiling everything anyway I took the ES7 route, allowing me to write code like:
router.get('/', async (req, res, next) => {
  const projects = await Project.query().orderBy('position')
  res.render('projects/index', {projects})
})
and:
const project = await Project.query()
  .where('id', +req.params.id)
  .eager(
    '[slides(orderByPosition), slides.images(orderByPosition)]',
    {orderByPosition}
  )
  .first()
(Objection’s eager queries make nested relations absolutely painless)
The main part of the backend is the drag-and-drop slide editor:


With this Geordie can simply upload images and drag and drop them into the layout grid. They fall where they’re dropped — snapped to the nearest column — and a click can set their width. I used the standard HTML5 drag-and-drop API for this:
const onDragStart = e => {
  const {offsetX, offsetY} = e
  e.dataTransfer.effectAllowed = 'move'
  e.dataTransfer.setData('text/plain', JSON.stringify({offsetX, offsetY}))
}

const onDrop = e => {
  e.preventDefault()
  const {offsetX, offsetY} = JSON.parse(e.dataTransfer.getData('text'))
  // ...
}
The rest is just some maths to figure out which column we’re on and then sending this data to the server. There’s only two fields needed in the database for this; columnsLeft (the column number the image starts at) and columnsWide (the width of the image in columns). Everything else is extrapolated from this and our 16 column grid.

And that’s the majority of it!
Thanks to Hassan and Geordie for being such a delight to work with, thanks again to Eric Hu for setting me up with them and thanks to the snek team on Slack for helping me brainstorm the best way to lay out the thumbnails.
If you have any questions about this project, or any other projects, get in touch with me via twitter or at ryan@artcommaco.de.
I’m now at the point where all JavaScript I’m writing is compiled via babel, even on the server. The recent release of Node.js 6.0 brought great ES6 support with it (const finally works correctly!) but I’m using more and more experimental features that won’t be landing in the EcmaScript standard any time soon and babel allows me to take advantage of this. More on that — including using async and await in production — in a later post.
I’ll start off with the final code:
const toArray = (list) => [].slice.call(list)

const first = (xs: T[]): T => xs[0]

const elemError = (e) => {
  throw new Error(`"${e}" doesn't exist in the document`)
}

const getRoot = (e: ?HTMLElement): Document | HTMLElement => (
  !e ? document : (document.body.contains(e) ? e : elemError(e))
)

export const query = (q: string, e: HTMLElement): HTMLElement[] => (
  toArray((getRoot(e)).querySelectorAll(q))
)

export const queryOne = (q: string, e: HTMLElement): ?HTMLElement => (
  first(query(q, e))
)
A few things to note here:
querySelectorAll and as such is meant for modern (post IE7 or post IE8 if you’re using CSS 3 selectors) browsers.Array.from I’m using my own toArray function as the shim is too large for me to comfortably include in a library.You’ll also note that rather than exporting a single function and making you guess whether you’d get an element or an array of elements back we now have two explicit functions to use. In version 1.0 of q I found that I’d often get errors when I didn’t know how many elements I’d be querying, expecting an array of elements only to get an element itself.
Using q — in an ES6 environment — is even easier than before:
import {query, queryOne} from '@artcommacode/q'

query('ul li')
// => [ <li>...</li>, <li>...</li>, <li>...</li> ]

query('ul li')[0].textContent
// => $1

queryOne('ul li')
// => <li>...</li>

queryOne('ul li') === query('ul li')[0]
// => true
You can compose queries by passing an element as the second argument:
const ul = queryOne('ul')
query('li', ul)
// => [ <li>...</li>, <li>...</li>, <li>...</li> ]
query will now return an empty array when no elements are found and queryOne will return undefined:
query('ul div')
// => []

queryOne('ul div')
// => undefined
q will throw an error if you try to run a query on an element that doesn’t exist:
const li = 'not_an_element'
query('div', li)
// => Error: "not_an_element" does't exist in the document
My experience with flow has been good, but not great. The inference is very clever but it’s clearly still in active development and there are times you’ll get completely unrelated errors when it can’t determine what you’re trying to do, or — even worse — it’ll assume any and not tell you that the type-checking has now become next to useless.
The code above has been annotated with types but my more usual flow workflow is to simply let it infer everything and use it as a form of static analysis, a more intelligent eslint that can tell me when I’ve misspelled variables or haven’t declared a function properly.
The other issue is that you need to use transform-flow-strip-types to remove the annotations when you compile your code. The first problem with this is transform-flow-strip-types lags behind flow and you’ll occasionally find yourself rewriting code that type-checked fine to stop it from throwing errors. The second problem is that your careful type annotations are now gone and you have no runtime guarantees. Because of this I’m now looking into solutions such as contracts — and contracts.js — rather than annotating my code for flow, while retaining flow for static analysis.
You can download q from npm.

Update 06/16: paintingid.com has been turned off, but you can visit an archive of the site at paintingid.artcommaco.de.
I recently had the pleasure to work on a website for the NYC artist Brendan Smith with designers Harry Gassel and Seth Hoekstra and 3D Illustrator James Orlando.
One of those short-notice jobs that always has the potential to become a nightmare it nontheless turned out to be a great time thanks to the professionalism of my main-point-of-contacts Harry and Seth. However, three.js was another matter entirely. A mess of horrible documentation, awkward anti-patterns and hundreds of mutable variables it took me a week before I could even display a painting on the screen and when I did it looked something like this:

After that it was a matter of figuring out rotations, positioning, texturing, hooking up controls and how to swap out colours and paintings on the fly. I then discovered how tricky it is to light a scene to show anything from white to bright purple to black. On the advice of a friend I ended up going with two lights, a very dark blue-black ambient light and a very bright yellow-white directional light.
Despite the pains of three.js it was great to have the opportunity to learn some new skills.


semify is the first of two tiny libraries I’ve released on npm. The reasoning behind it’s simple I’d rather not use semicolons but browserify would prefer I did. This small transform keeps us both happy by piggy-backing onto the hard work done both by semi and browserify-transform-tools.
To use:
$ npm install --save @artcommacode/semify
$ browserify -t @artcommacode/semify main.js
The module itself is only 12 lines long:
var semi = require('semi')
var util = require('util')
var transform = require('browserify-transform-tools').makeStringTransform
var options = {includeExtensions: ['.js']}

semi.on('error', function (error) {
  throw new Error(util.format('%s at %d:%d', error.message, error.line, error.column))
})

module.exports = transform("semify", options, function (content, _, done) {
  done(null, semi.add(content))
})
For further information, see the semify page on npm.